Hi-Pass is a must for anyone driving. Normally, there is no reason to check your Hi-Pass usage history, but if you have to work outside for work, you will need to print a receipt to prove it because you will need to claim toll fees.
Also, you need to distinguish between Hi-Pass tolls used for work and Hi-Pass tolls used for leisure purposes. So today, we will learn about how to check Hi-Pass usage history and how to print entire receipts and receipts for selected items.
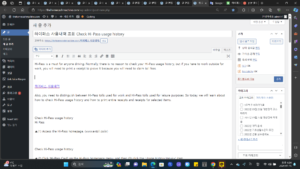
Check Hi-Pass usage history
Hi Pass
▲(1) Access the Hi-Pass homepage. (www.extoll.co.kr)
Check Hi-Pass usage history
▲(2) Click ‘Hi-Pass Card’ on the Hi-Pass homepage menu, and then (3) click the ‘Usage History Inquiry’ item.
Hi-pass receipt
▲If you have an account on the Hi-Pass website, log in with your ‘ID/password’. If not, use your public certificate or i-PIN to log in. I usually log in using a convenient i-PIN.
I-pin
▲i-PIN login window. Log in after entering your i-PIN account information and auto-input prevention characters.
Check Hi-Pass usage history
▲Once login is completed, you will be accessed in the ‘Usage History Inquiry’ window.
(1) Card company: You can select a Hi-Pass card in your name. Since many people usually use only one type of Hi-Pass card in their car, you can set it to All/All. If you use multiple cards, you can click to search by card company.
(2) Card number: Select the card corresponding to the card company.
(3) Inquiry period: The inquiry period is up to one month, and since information is stored for up to 3 years, you can only inquire usage history up to 3 years ago.
(4) Inquiry criteria: Date of use – Based on the date the Hi-Pass was passed / Billing date – Based on the date charged to the card company. Usually, it is convenient to look at it based on the date of use.
(5) Construction/private division: You can view the total or road construction high-pass and private-investment high-pass separately.
(6) Sorting criteria: By date: Sort by date according to the search criteria / By card: If there are two or more cards used for Hi-Pass, it is better to view them by card. If you only use one card, search by date.
(7) Sort by: Sort by latest date or previous date (oldest).
(8) Receipt time display: You can display or hide the time when you passed the high pass.
(9) Number of outputs: It is better to set the number to the maximum rather than searching again because there are not enough spaces, so you can search at 100.
Hi-pass receipt
▲My Hi-Pass usage history for the month of June has been viewed. I paid the fare after passing through Hi-Pass a total of 43 times. If you look at the top, you can see (total of 43 cases / total of 98,900 won). Even with the Hi-Pass fee per month, it costs quite a bit haha.
However, among these, there is a Hi-Pass paid for company business, so I will select only that part and print the receipt.
Hi-pass receipt printing
▲Select only the Hi-Pass details used while traveling outside and click the checkbox on the left.
Hi-Pass usage details
▲If you scroll to the top, you will see the number of selections and total amount next to the full details. Of the total Hi-Pass usage amount of 98,900 won in June, the amount used while working outside was 19,300 won. You only need to print and submit supporting receipts for these 14 cases.
Print Hi-Pass Receipt
Hi-pass receipt printing
▲There are print menus at the bottom of the usage details. I will explain them one by one starting from the left.
(1) Print: Prints the current usage history window as is.
(2) Excel output: You can convert the current usage history window to Excel and download it. Personally, when organizing, it is better to download it in Excel and organize it.
(3) Print all receipts: Print receipts for the total number of receipts within the inquiry period.
(4) Receipt selection print: Prints receipts for the selected number of items within the inquiry period.
Hi-pass receipt printing
▲This is the receipt output window. If you print with the default settings, you can conveniently print 3 items per line in A4 size. Click the Print Receipt button at the top to print it.